how to connect your professional email with Gmail, the simple way to connect your email with Gmail services to send and receive with the service of Gmail
Say, you got two promotional emails – one from yourwebsite(at)gmail(dot)com and another email from info(at)yourwebsite(dot)com. Out of the previous two email addresses which website linked in the email are you most probably to visit? On a confidential note, it would be the website noted in the last email as it sounds more credible.
If you’re a new online company, the probability is you’ve already purchased hosting and set up your website. For your business to grow it is important that you advertise your brand name well. A personalised email mirroring your brand name is one of the best ways to encourage your brand and build credibility.
Gmail is a famous email hosting choice for setting up a new enterprise email account. Setting up a new email hosting account in Gmail is not as difficult as you might think. All you require to do is follow these steps in the correct order and your Gmail account should be set up.
Advantages of Using a Professional Email Address
There are different advantages to using a professional brand name for your email address. Let’s have a look at them:
- Marketing – A well-branded email address adds credibility and professional appeal to your business. Moreover, with time it assists improve the mention of your brand whenever a consumer sees the branded email address in all the marketing movements.
- Monitoring – A business email address also allows you to track and monitor your customer’s activity – whether they did open your email or not, and so on.
Simple Guide on how to connect Webmail to Gmail
The first step is to set up the process for accessing brightery hosting services. in the account (your hosting account) in Gmail
- Login to your Gmail Account, and create a new one if you want to make a separate account for work.
- On the top right-hand corner, open the Settings in Gmail mail settings and choose Settings

- Click See All Settings
- Click Accounts and Import
- Locate the ‘Check mail from other accounts’ setting and then click Add a mail account

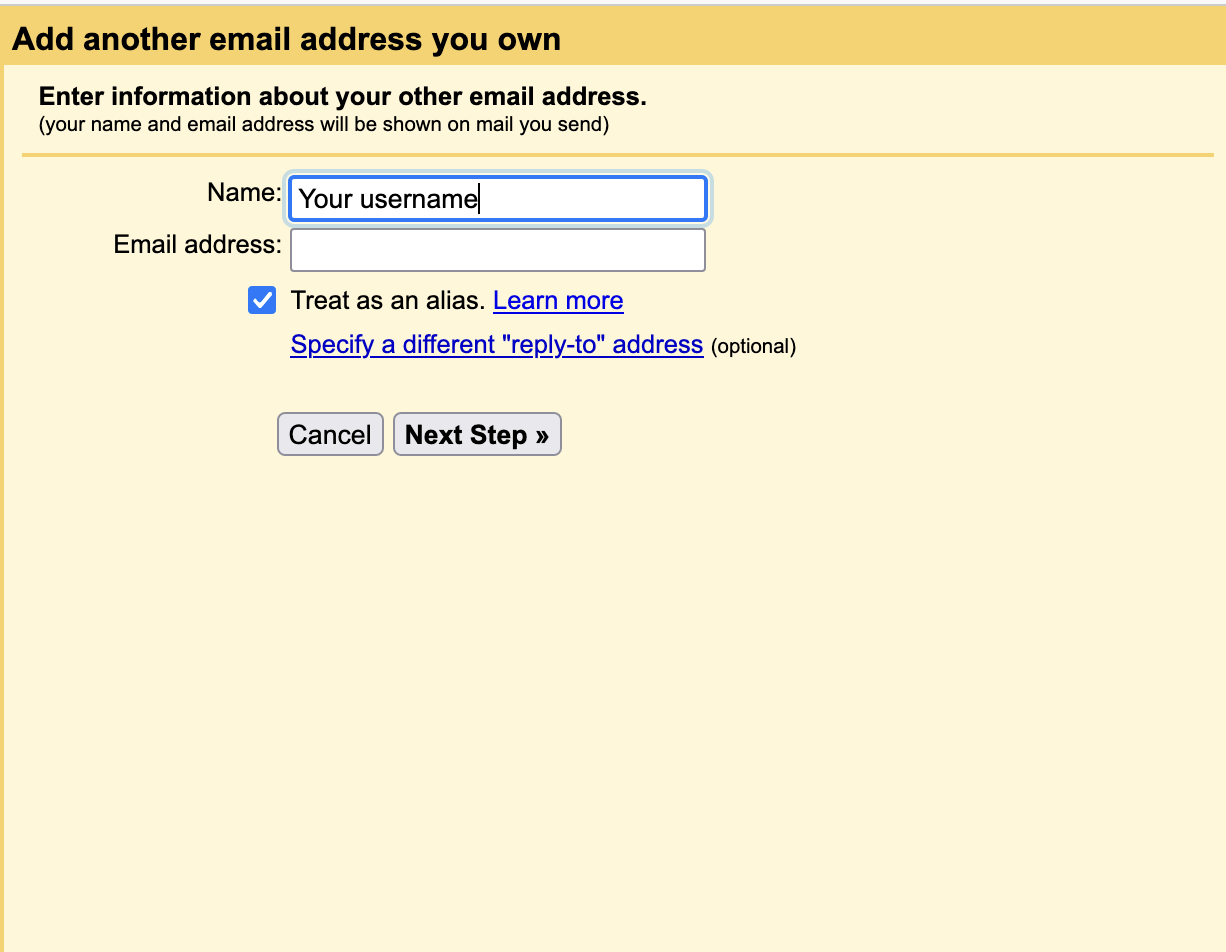
A new window will appear, and then you need to add the following with the same steps we're going to show you here.

- Enter your Name wants to appear
- Your email address and uncheck on (Treat as an alias).
In this step, you need to add your domain email ([email protected]).
- Click the Next button
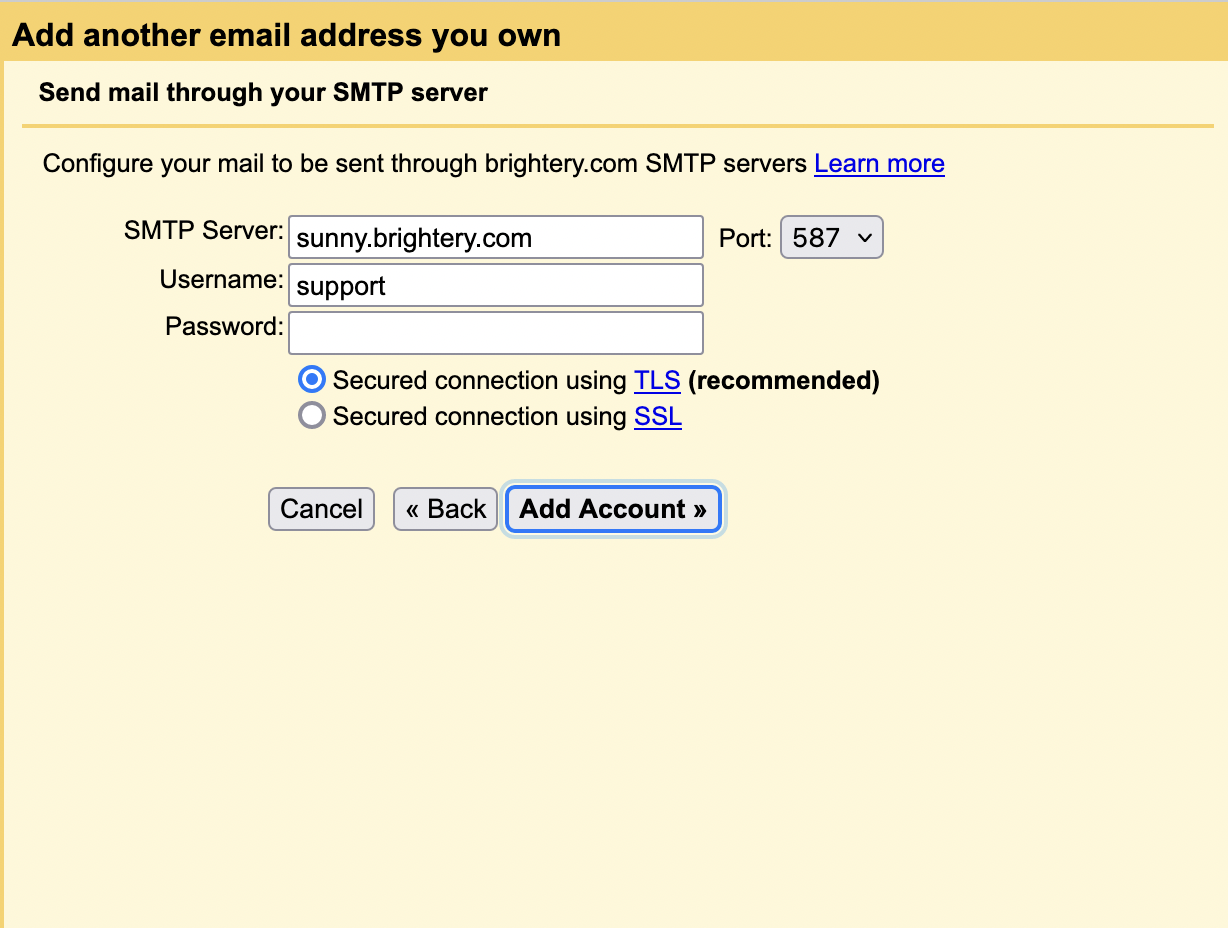
The new window will appear a window with special requests, these are (nameserver, email address, ports, and password)

- Enter your full email address as the Username
- Enter the Password for your email account
- Enter the POP Server. This will vary depending on if you choose to use the Always use a secure connection (SSL) option
- Without SSL: This will be your domain name preceded by ‘mail.’
- With SSL: This will be your server's hostname (You get it from your account manager if you're with brightery). Also, make sure the port is changed to the port sent by your account manager. If you don’t know your server's hostname (You get it from your account manager if you're with brightery), go to your cPanel. On the left side, you will see a section called stats. Click the expand stats link if it is present. The hostname will be shown in the list of stats.
- Choose any additional options you may want
- Click the Add Account button
Now that you’ve established the link between brightery.in and your Gmail account. It is time to set up the outgoing email settings.

{{comments.length}} Comments
{{comment.name}} · {{comment.created}}
{{sc.name}} · {{sc.created}}
Post your comment